Key Takeaways
- Preparation is Paramount: Victorian pine is a softwood; ensure every nail is punched to avoid shredding abrasives.
- Grit Sequence: Start with 40-grit Zirconia on uneven boards, progressing to 120-grit for a silk-smooth finish.
- Gap Filling: Use reclaimed pine slivers for structural stability and traditional aesthetics.
- Humidity Control: Ensure timber moisture content is below 12% before applying Osmo Hardwax Oil in UK climates.
- Curing Times: Allow 24 hours between coats of hardwax oil for optimal tannin protection.
The Problem: Many Victorian terraces across Kent and London hide a treasure trove of heritage timber beneath decades of grimy carpets, bitumen, and thick, orange-tinted varnish. These floorboards are often cupped, gapped, and riddled with rusted nails, making them look beyond salvage to the untrained eye.
The Agitation: Living with damaged Victorian pine isn’t just an aesthetic issue. Drafts whistle through 5mm gaps, heat escapes into the subfloor, and splinters pose a constant risk to pets and barefoot inhabitants. Worse still, amateur attempts at restoration often lead to ‘dish-out’ around the grain or deep drum marks that permanently mar the historic timber, potentially costing thousands in VAT-inclusive repair bills from specialist tradesmen.
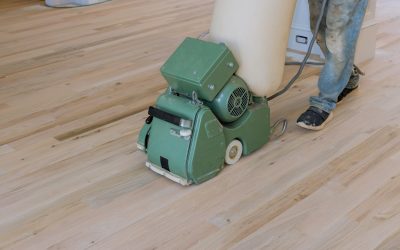
The Solution: Professional heritage restoration. By employing dust-free machinery like the Lagler Hummel and high-performance finishes such as Osmo Hardwax Oil, you can transform these battle-scarred boards into the centrepiece of a modern home. This guide provides the technical roadmap to achieving a world-class finish on UK heritage pine.
Pro-Tip: The Grit Sequence for Victorian Pine

Victorian pine, typically Scots Pine or Deal, is a softwood that has seasoned for over a century. It is significantly more reactive to moisture and mechanical pressure than modern engineered oak. When we approach floor sanding and wood floor restoration, our grit sequence is calibrated to remove enough material to level the boards without exhausting the ‘wear layer’ of the timber.
- The Initial Cut (40-grit Zirconia): On uneven boards or those covered in bitumen, we start with 40-grit Zirconia. This aggressive abrasive is essential for cutting through old paint and leveling cupped boards. Pro-Tip: Sand at a 7-degree angle to the grain for the first pass to flatten the boards faster.
- The Refinement (60-grit / 80-grit): Once flat, we switch to Silicon Carbide belts. The 60-grit pass removes the scratches from the Zirconia, while the 80-grit begins the smoothing process.
- The Final Buff (100-grit / 120-grit): We use a Trio or Multi-disc sander for the final pass. For pine, finishing at 120-grit ensures the grain is open enough to accept oil but smooth enough to resist dirt.
The Art of Gap Filling: Resin vs. Slivers
Victorian floorboards were never intended to be ‘naked.’ They were subfloors designed for rugs. Consequently, gaps of 3mm to 8mm are common. In the UK, seasonal humidity shifts cause these boards to expand and contract significantly. While resin gap filling (mixing sanding dust with a binder like Blanchon Resin Filler) is excellent for parquet floor restoration in Kent, it often fails on long-run pine boards due to movement.
For heritage restoration, we recommend Pine Slivers. These are tapered wedges of reclaimed pine that are glued into the gaps using a high-quality D3 PVA glue. Once dry, they are sanded flush. This provides a structural fill that moves with the floor and eliminates drafts permanently. It’s a painstaking process but one that separates a basic sand-and-seal from a true restoration.
Finishing with Osmo Hardwax Oil in UK Humidity

The choice of finish is critical. While lacquers provide a hard-wearing ‘plastic’ film, they can look unnatural on 150-year-old timber. We prefer Osmo Polyx-Oil for its ability to penetrate the wood fibres while leaving a protective wax surface.
Dealing with Tannin Pull: Pine contains resins and tannins that can ‘bleed’ through finishes. To prevent this, we often suggest ‘water popping’—a process where we lightly mist the sanded floor with deionised water to raise the grain before the final sand. This ensures an even absorption of the oil.
Application Strategy: In the UK’s often humid climate, Osmo requires careful application. Two thin coats are far superior to one thick coat. A 10-inch floor brush or a microfibre roller is best. If the humidity is above 65%, curing times will double. Do not replace furniture for at least 48 hours, and avoid rugs for 10 days while the wax fully hardens.
Conclusion: Investing in Your Home’s History
Restoring Victorian pine floorboards is more than just a renovation; it’s an act of stewardship for your property’s history. Whether you are prepping a townhouse for sale or creating a warm family home, the combination of technical grit sequences and premium finishes like Osmo or heritage-appropriate lacquers ensures a result that lasts a generation. For more information on starting your journey, check our beginner’s guide to sanding or visit our restoration services page for a free consultation.