Key Takeaways
The Problem: Engineered wood flooring has become the dominant choice in modern Kent homes and new-build developments across Maidstone, Tunbridge Wells, and the Medway towns. Marketed as a ‘fit-and-forget’ solution, many homeowners are now discovering—five to ten years later—that their once-beautiful floors are scratched, dull, and showing significant wear in high-traffic areas such as hallways and open-plan kitchen-diners. The common assumption is that engineered boards simply cannot be sanded, leading thousands of Kent homeowners to consider the enormous expense of full replacement.
The Agitation: The confusion is understandable. Budget-grade engineered boards with a 0.6mm veneer genuinely cannot withstand sanding—attempting it will expose the plywood substrate and ruin the floor permanently. However, quality engineered boards with a 3mm to 6mm wear layer can absolutely be sanded and refinished by experienced tradesmen, potentially saving homeowners thousands of pounds plus VAT compared to full replacement. The danger lies in incorrect assessment: using an aggressive drum sander on a thin veneer, or applying a water-based lacquer to a board that requires an oil finish, can result in irreversible damage, delamination, and a very expensive lesson.
The Solution: Professional engineered wood floor sanding. By conducting a thorough wear layer assessment, utilising precision dust-free machinery, and applying appropriate finishes calibrated for UK humidity, specialist tradesmen can restore engineered floors to showroom condition. This comprehensive guide explains the technical realities of engineered wood floor restoration in Kent—what is possible, what is not, and how to achieve a world-class result.
Understanding Wear Layers: The Critical First Assessment
Before any sanding machine touches an engineered floor in Kent, a professional assessment of the wear layer thickness is absolutely essential. The wear layer—the solid hardwood veneer bonded to the plywood or HDF substrate—determines everything: whether the floor can be sanded, how many times it can be refinished, and which machinery and grit sequences are safe to use.
As a general rule used by our tradesmen across Kent, wear layer thicknesses fall into three categories:
- 0.6mm to 1.5mm: These ultra-thin veneers, common in budget installations across new-build estates, cannot be sanded. The only option is a light maintenance buff and re-oil to refresh the surface without removing material.
- 2mm to 3mm: A single careful sanding is usually possible, but only with lightweight orbital equipment and conservative grit selection. There is no margin for error.
- 4mm to 6mm: These premium boards, often found in higher-end Kent properties, can typically withstand two or three full sanding cycles over their lifetime, provided each is performed professionally and conservatively.
Pro-Tip: The Pin Gauge Test. We use a digital pin moisture meter with a depth gauge to measure the exact remaining veneer thickness at multiple points across the floor. This is critical because previous sanding (even a ‘light sand’ by a previous owner) may have already removed 0.5mm or more. We also check at board edges and around doorways where wear is heaviest. If the remaining veneer is below 2mm at any measurement point, we will advise against a full sand and recommend a screen-and-recoat protocol instead.
The Machinery Question: Why Festool Outperforms on Engineered Boards
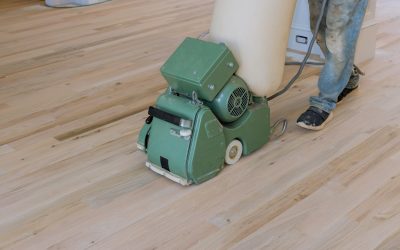
Traditional belt sanders like the Lagler Hummel or Bona Belt, whilst superb on solid timber, are often too aggressive for engineered flooring. The continuous belt action and high drum pressure can sand through a thin veneer in a single pass—a catastrophic and irreversible mistake.
For engineered wood floors in Kent, we rely predominantly on the Festool Planex and Festool ROTEX systems. These random-orbital machines operate with a fundamentally different action to belt sanders. The eccentric motion distributes sanding pressure evenly, removing material gradually and uniformly. This gives the operative far greater control over material removal—measured in fractions of a millimetre rather than the aggressive cuts a belt sander delivers.
For larger spans in open-plan living areas—increasingly common in Kent’s modern housing developments around Ashford and Canterbury—we use the Bona Flexisand with multi-disc pads. The Flexisand’s planetary drive system provides the coverage speed needed for commercial-sized domestic spaces whilst maintaining the gentle, controlled abrasion that engineered boards demand.
The Correct Grit Sequence for Engineered Oak
Grit sequencing on engineered boards is deliberately more conservative than on solid timber. The goal is refinement with minimal material removal. Our standard sequence for a 4mm+ European oak veneer is:
- 80-grit Aluminium Oxide: Initial pass to remove the existing finish and light surface damage. We avoid Zirconia abrasives at this stage—Zirconia’s aggressive cut rate is designed for solid timber and old lacquers, not for controlled veneer work.
- 100-grit Aluminium Oxide: Refinement pass to eliminate the scratch pattern from the 80-grit. This is where most imperfections disappear.
- 120-grit Silicon Carbide: Final pass for a silky-smooth surface. At this grit, we switch to Silicon Carbide for its finer scratch pattern, ensuring the chosen finish bonds evenly without visible sanding marks.
Pro-Tip: Never skip a grit level. On solid wood floors, an experienced operative can sometimes jump from 60-grit to 100-grit on dense hardwoods. On engineered boards, this shortcut leaves visible ‘pigtail’ scratch marks in the veneer that become glaringly obvious once the finish is applied. Every grit increment matters.
Floating vs. Glued-Down: How Installation Affects Sanding
The method used to install the engineered floor significantly impacts how it can be sanded. In Kent, we encounter two primary installation methods, each presenting distinct challenges.
Click-lock floating floors are the most common in modern Kent homes. These boards ‘float’ over an underlay without any adhesive bonding them to the subfloor. The challenge here is vibration. A heavy sanding machine can cause floating boards to bounce and chatter, resulting in an uneven sand and potential damage to the click-lock joints. We address this by using lighter equipment (the Festool ROTEX rather than a heavy belt sander) and by ensuring the operative moves with the grain at a consistent, slow pace.
Fully bonded (glued-down) engineered floors are rigidly fixed to the subfloor, eliminating the vibration issue entirely. These can be sanded with greater confidence and slightly heavier equipment, as the adhesive bond prevents any board movement. For Kent homeowners considering a new engineered floor installation, we always recommend full bonding specifically because it dramatically extends the floor’s refinishing potential over its lifetime.
Moisture Content and the UK Climate Factor
Kent’s maritime climate creates unique challenges for engineered wood floor finishing. Indoor relative humidity in UK homes typically fluctuates between 40% in centrally heated winter rooms and 65-70% during damp autumn months. This variation directly affects both the timber’s moisture content and the curing behaviour of applied finishes.
Before finishing, we verify the timber’s moisture content using a calibrated pin meter. For engineered oak in a Kent property, we require a reading between 7% and 11% before any finish is applied. If the reading is above 12%, the room must be ventilated and dehumidified before proceeding—applying oil or lacquer to damp timber causes ‘tannin pull,’ where the natural acids in oak react with the finish to create permanent dark blotches.
Choosing the Right Finish: Osmo Hardwax Oil vs. Water-Based Lacquer
The finish choice for engineered floors in Kent depends on the room’s function, the homeowner’s aesthetic preference, and the board’s construction.
Osmo Polyx-Oil for Natural Warmth
For living rooms, bedrooms, and dining areas, we frequently recommend Osmo Polyx-Oil 3032 (Satin). This hardwax oil penetrates the veneer fibres rather than sitting on the surface like a plastic film, creating a microporous, breathable finish that enhances the natural grain pattern of the oak. It is also significantly easier to maintain—localised scratches can be spot-repaired without sanding the entire floor, which is a major advantage given the limited wear layer on engineered boards.
Application Protocol for UK Conditions: We apply two thin coats using a stainless-steel trowel for the first coat (ensuring maximum penetration) and a microfibre roller for the second. In typical Kent indoor conditions (18-22°C, 50-60% RH), we allow a minimum of 8-12 hours between coats. Full chemical cure takes 10-14 days, during which the floor should receive only light foot traffic with felt-padded furniture protectors.
Bona Traffic HD for High-Wear Areas
For hallways, open-plan kitchen-diners, and any area subject to heavy foot traffic, Bona Traffic HD remains the gold standard. This two-component waterborne polyurethane lacquer cures to an extraordinarily hard, scratch-resistant film. It reaches 90% cure within 24 hours and full chemical resistance at 72 hours—significantly faster than oil finishes. For busy Kent families who cannot vacate a room for two weeks, Bona Traffic HD is often the pragmatic choice.
Pro-Tip: The Primer Matters. On engineered oak, we always apply a coat of Bona Classic UX primer before the Bona Traffic HD topcoats. This primer seals the veneer evenly, preventing ‘side-bonding’—where lacquer seeps between board joints and effectively glues them together. When the boards naturally expand and contract with UK seasonal humidity changes, side-bonded joints can crack or delaminate. The primer creates a barrier that allows the boards to move independently beneath the protective lacquer film.
Common Mistakes to Avoid with Engineered Floors
Over our decades of experience restoring engineered floors across Kent, we have corrected numerous costly DIY and inexperienced-contractor errors. The most common include:
- Using a hire-shop drum sander: These machines are designed for solid timber and have neither the finesse nor the adjustability needed for veneer work. One pass too many, and the plywood is exposed.
- Applying oil over existing lacquer: Oil cannot penetrate through a lacquer film. The result is a sticky, patchy surface that must be fully stripped—wasting the precious wear layer.
- Ignoring subfloor moisture: In Kent’s older properties, concrete subfloors can transmit significant moisture. Without a proper DPM (Damp Proof Membrane) beneath the engineered boards, moisture migrates upward, causing grain raising, cupping, and eventual delamination of the veneer.
- Water popping engineered boards: Unlike solid timber, engineered veneers should generally not be water popped before staining. The thin veneer absorbs water unevenly compared to solid wood, and the raised fibres may not sand back smoothly without removing too much material.
Aftercare: Protecting Your Investment
A professionally sanded and finished engineered floor in a Kent home should last 8-12 years before requiring another refinish—provided it receives proper aftercare and maintenance. For oiled floors, we recommend a maintenance oil application every 12-18 months using Osmo Liquid Wax Cleaner during a light buff with a white polishing pad. For lacquered floors, a professional ‘screen and recoat’ every 3-5 years extends the finish life dramatically, preventing the lacquer from wearing through to bare timber.
Daily care is straightforward: sweep regularly with a soft-bristle broom, use pH-neutral cleaners (never vinegar-based solutions, which strip oil finishes and dull lacquer), and place felt pads beneath all furniture legs. In Kent’s variable climate, maintaining indoor humidity between 45% and 60% year-round prevents excessive timber movement.
Conclusion: Restoration, Not Replacement
The overwhelming majority of engineered wood floors in Kent homes can be restored to their original beauty through professional sanding and refinishing—at a fraction of the cost and disruption of full replacement. The key lies in accurate wear layer assessment, appropriate machinery selection, conservative grit sequencing, and a finish chosen specifically for the board type and room function. For Kent homeowners with tired engineered floors, professional restoration is almost always the smarter investment. For a free site assessment and detailed quotation, contact Kent Floor Sanding today.